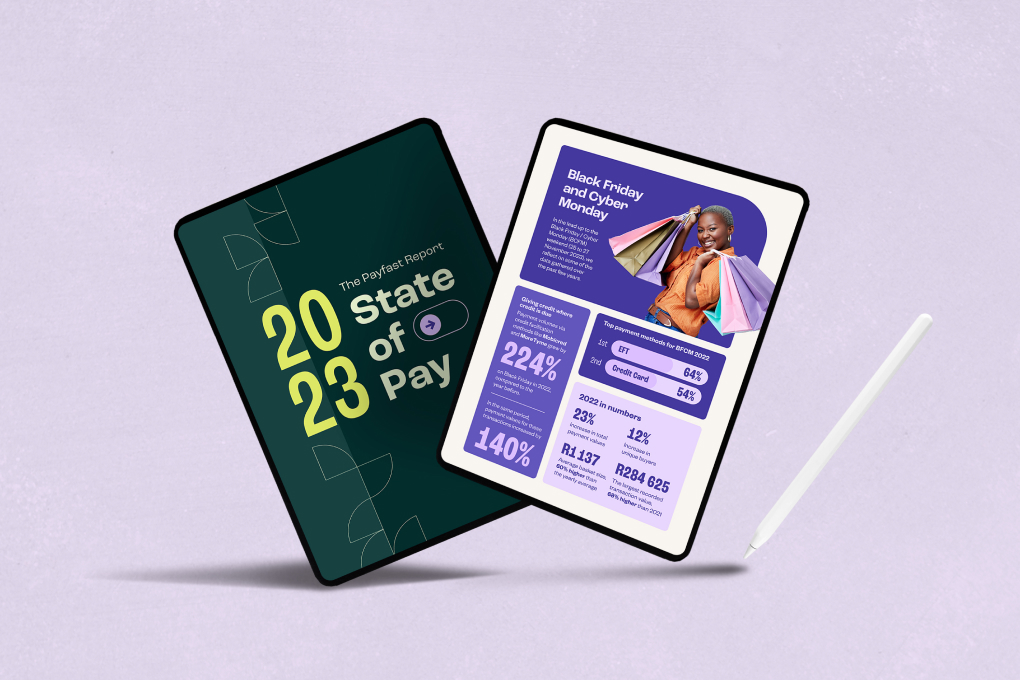
Are you planning on hosting an event and looking for a cheap (ahem, free) solution? Consider CampTix. It is easy to use, easy to implement and has some great features:
- Discount coupon codes
- Mass email attendees
- Export of attendee data
- Revenue reports
The CampTix plugin was first created and used for WordCamp San Francisco 2012 and the PayFast module was added this year and used WordCamp Cape Town 2013.
Let’s get started!
Requirements
- A hosted WordPress installation (not WordPress.com)
- A (free) PayFast seller account (if you plan on selling tickets)
Installation
From your WordPress dashboard, select Add New from Plugins in the sidebar and search for CampTix. Download/install and activate both the CampTix Event Ticketing and CampTix PayFast Payment Gateway plugins.
After activation you’ll notice Tickets appear in the sidebar:
Setting up PayFast payments
From the sidebar, select Tickets, Setup.
Under the General tab, set the name of the event change the currency to South African rand and save your changes.
On the Payment tab, PayFast will display if you installed and activated both plugins. Enter your Merchant ID and Merchant Key (we emailed this to you when you created your account, but can also be found by logging in to your PayFast account and clicking on the Settings tab. Hit Save Changes.
(You can keep your site in Sandbox if you want to test it, or turn Sandbox off to process actual payments)
You can even set custom templates for the notification emails that get sent to the attendees:
Creating tickets
From the sidebar, select Tickets, New Ticket.
Enter a ticket name, exerpt and (optionally) customise the form fields:
Set a ticket price and quantity. The Availability feature is great for limited tickets (or to tier your ticket prices with Early Bird discounts).
Hit the Publish button. If you’ve got multiple tickets (Early Bird, VIP, General etc.) you can set them up now.
Adding tickets to a Page
Simply embed the shortcode [camptix] on the Pages (not Posts) where you want your tickets to be shown. After hitting the Publish/Update button, your visitors should be able to buy tickets from your site. It looks beautiful, out of the box, but as with most things WordPress, you can customise the CSS to match the look and feel of your site.
Reporting, Revenue, Notifications and Discounts
You can export a list of your attendees, see the revenue brought in so far (that said, your PayFast account’s History tab will have a more elegant summary of your sales), and send out email notifications to the different ticket holders by selecting Tools from the sidebar.
A very useful feature is the Coupons option. This allows you to set discounts (fixed or percentage) for some (or all) of your tickets. You can generate unique coupon codes, which you can give to some strategic partners (or use in your different social channels) to help you promote your event. CampTix reporting will show you how many of each of the coupons were used, making it easy to see where your marketing efforts are best spent.
In closing
CampTix is a simple solution for those with basic ticketing needs. It lacks some of the more advanced features that solutions like Event Espresso offers – such as smartphone ticket scanning, seat selection and the like—but it is powerful, easy to implement and considering the price (free) it is really worth trying.
If anyone has used this for a South African event, please share it with us below and let us know how it went!
Footnote: WordCamp.org has more information on all CampTix features.